Download pixie
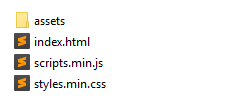
Download latest version and extract it. Afterwards, you will be left with two folders: source and pixie. source folder contains all original source code for pixie. pixie folder contains the files needed to actually use pixie, it has this simple structure:
QuickStart
If you want to preview or use pixie as fast as possible, simply upload contents of pixie folder to your server and open your site url. You can open index.html file with a text editor to change pixie configuration.
Integrating
In order to integrate pixie into existing project, copy pixie folder into your project. Then simply link to the scripts.min.js and styles.min.css files inside your project, like so:
<html>
    <head>
        <link rel="stylesheet" href="pixie/styles.min.css">
    </head>

    <body>
        <script src="pixie/scripts.min.js"></script>
    </body>
</html>
Now, create a <pixie-editor></pixie-editor> tag as a container for the editor. Pixie will adapt its size according to the dimensions of the container (if dimensions are not provided in configuration).
<div class="some-container">
    <pixie-editor></pixie-editor>
</div>
Finally, in order to initialize pixie, instantiate it using JavaScript. Add the following code right below pixie <script src="pixie/scripts.min.js"></script> tag:
var pixie = new Pixie({
    image: 'http://url-to-image.png',
    onLoad: function() {
        console.log('Pixie is ready');
    }
});
This is all that is required to get pixie up and running.Here is the whole source code of the html file:
<html>
<head>
<link rel="stylesheet" href="pixie/styles.min.css">
</head>
<body>
<pixie-editor></pixie-editor>
<script src="pixie/scripts.min.js"></script>
<script>
var pixie = new Pixie({
onLoad: function() {
console.log('Pixie is ready');
}
});
</script>
</body>
</html>